

Grand Cherokee [“ZJ”] Project
Click on boxes below to view different phases of the build.


-Lighted rocker switch
-Previously installed or new fuse block
-Wiring
Drill, misc. sockets/wrenches, wire cutters, sillicon
&
1 hour of time
Process:
STEP 1 - Install switches/fuse block for lights: If you've already installed lights, you likely already have a fuse block and additional switches. Because the three switches we installed were all already used up by the driving, spot, and light bar, we needed to install more switches. The lighted rocker switches can be picked up from Amazon or Napa. We decided to make a custom panel on the overhead display. See the photos on the right. We cut a custom piece of wood that fit in the garage door opener. The switches were sunk into the wood and everything was painted black to match. Using two screws, we held the piece in place. Switches can be placed anywhere and don't require this level of customization.

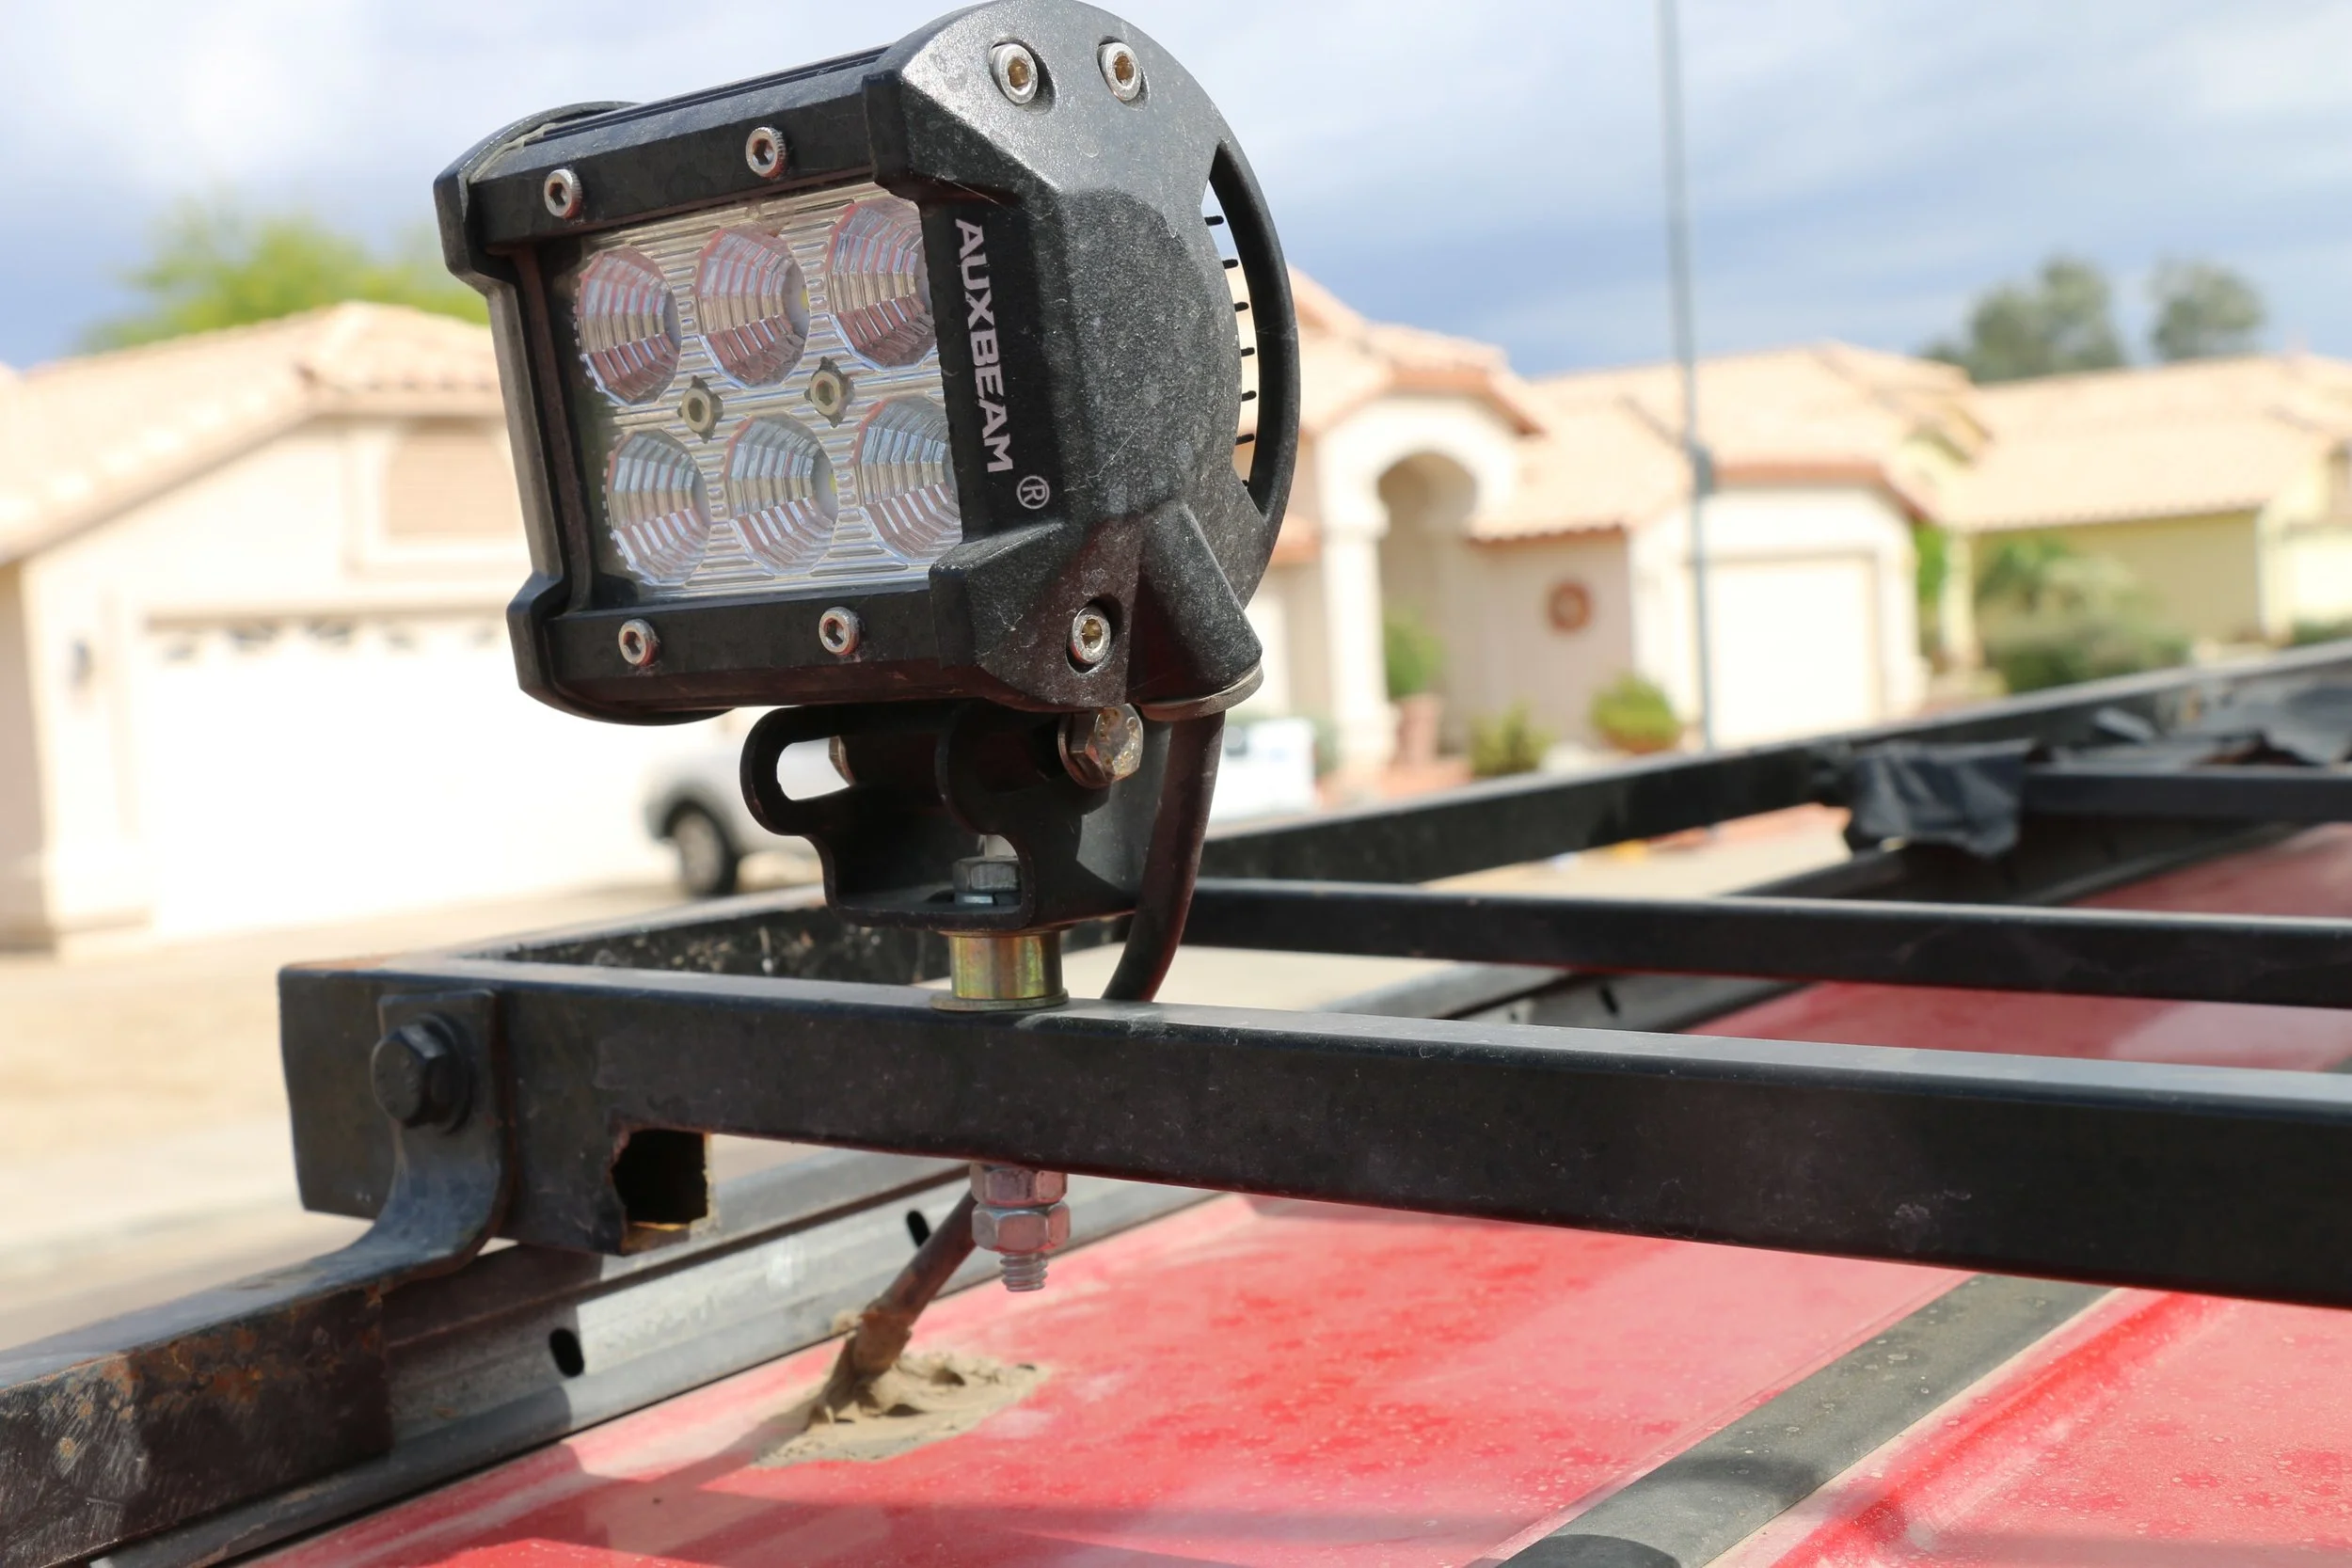
STEP 2 - Drill holes for lights/install mounts: We mounted these lights direct to the rear part of the roof rack. The lights come with mounts that can be attached to any bolt. These light pods would also be great for side facing lights or lights mounted to the mirrors. With two quick holes drilled, we were ready to attach the lights.
STEP 3 - Run wires to lights: Run wiring from the switches to the location of the lights. Because we put our switches in the overhead console, we had to run wires first from the fuse block under the hood, then above the roof liner to the back of the vehicle. Additional wiring may be needed depending on how far you place the lights from the switch. We drilled a hole in the right rear portion of the roof to get the wires out. Attach the switch load wire to the lights, then ground the switch.

STEP 4 - Mount lights and hook up wires: Bolt the lights in the holes you previously drilled in step #2. Use silicone to seal the hole in the roof and zip ties to tuck the wires against the rack. Adjustments might be needed to get the light angle just right. Test out the lights to ensure everything works and you don't blow a fuse.
