

Grand Cherokee [“ZJ”] Project
Click on boxes below to view different phases of the build.


Lighted rocker switches, fuse block, electrical wires
&
1-2 hours of time
Process:
STEP 1 - Install fuse block: If you plan on adding additional lights to your vehicle, it is a good idea to install a separate fuse block. Most fuse blocks include 6 to 8 additional ports where you can plug in auxiliary lighting, and each one is on its own separate fuse to prevent any major electrical issues. This is an easy install and involves running power from your battery to the location of the fuse block. Under the hood space in the V8 ZJ is limited, but we found the best location to mount the block is on the driver's side near the windshield fluid reservoir. Doing this will allow easy access through the firewall and into switches inside the cabin.

STEP 2 - Install switches inside cabin: Ideally, you want manual control over each set of lights. You could wire the driving lights into the headlight switch if desired, but we wanted everything to be separate. You'll want to buy multiple switches either online on Amazon or from a NAPA store. We choose the red, lighted rocker switches. The location of install will depend on personal preference -- we found that the best location to be on the right lower panel beneath the overdrive and rear windshield wiper buttons. Drill into the plastic paneling to mount the switch, and ensure the wiring is properly installed. You'll need a power supply (from the fuse block), a good ground, and a load wire that will run back to the lights.

STEP 3 - Remove factory fog/driving lights and install new lights: The factory lights come off the front bumper very easily and it can be done with a single socket wrench. You DO NOT need to remove the front bumper cover as shown on the right. You will need to remove the grill to access the wiring. We removed the bumper cover to replace the headlight assembly, which it turns out also wasn't necessary. The ProComp lights we installed bolted directly into where the factory lights went. We ran the wiring under the grill and up the front left fender to connect with the load wire coming from the lights.
STEP 4 - Make sure the new lights work and adjust as necessary: Ensure the wiring is done properly and you don't blow a fuse when you toggle the lights. You'll likely need to adjust the angle of the lights which can easily be done by un-loosening the bolt that attaches the light to the mount. Check local laws to make sure you can run the lights while driving. Lights mounted above the headlights are not legal to run on public roads.

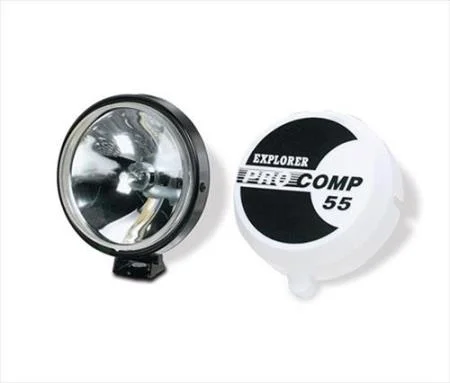
STEP 5 - Install additional lights: The process to install additional lights basically follows this same process. Run the proper wiring from the fuse block to the switch, and then from the switch to the lights. We installed 2 additional ProComp spot lights on the roof. This will again come down to personal preference depending on where you want the lights mounted. We used the factory roof rail as a light mount. Mounted in the very front slot, this had turned out to be an ideal place to mount things and it is totally free. Drill through the roof rails to mount the lights. Use some sort of electrical tape or wire housing to protect the wires that are exposed outside the vehicle. Run the wire from the lights, down into the roof and down the A-pillar to the switches. Unfortunately, this means removing the A-pillar plastic covers, the driver-side sun visor, and the lowering the roof carpeting. Installing lights on the roof is slightly more intensive, but taking a little time will make your install clean and work for years to come.

STEP 6 - Install new headlights & taillights (optional) and put everything back together: Because our headlights and taillights were completely fogged out, we decided to replace everything when we installed the auxiliary lighting. Getting a cheaper aftermarket set will run you under $200 all the way around. This isn't necessary to installing other lights. All of the lights pop out with a few bolts and are quickly replaced with the better looking lights. Put everything back together (grill, paneling inside, etc) and you're good to go!
The Jeep with all new lights installed. See the roof rack page for how to build the rack pictured.
